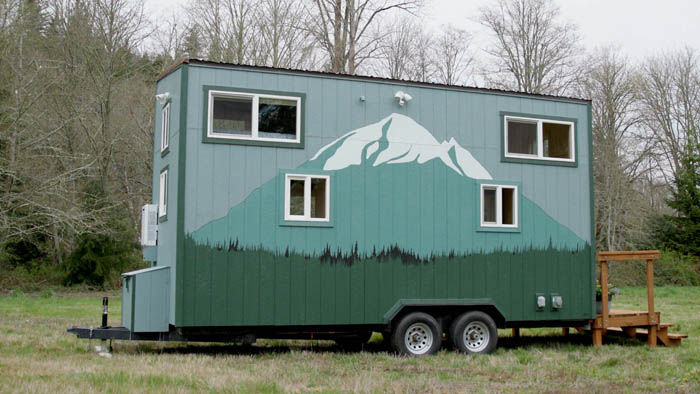
Bringing home your new Mount Baker Tiny Home is an exciting step. While the setup is straightforward, it’s worth understanding the basics so you and your contractor can plan ahead. This page assumes you are setting up connections in your home, but of course, where you can put a tiny home depends on local regulations and what type of tiny home you have. These specifications are for a tiny home made to the RV code. Below you’ll find the essentials for connecting your home to utilities — electrical, plumbing, water, and propane.
Electrical
If you can power an RV, you can power one of our tiny homes. All our models are designed with RV-style electrical service or “shore power,” making it easy to get connected. With the right breaker and outlet in place, you’ll be ready to plug in and go.
Technical Details
- Service type: 50 Amp, 220V dedicated circuit (RV standard).
- Connection: NEMA 14-50 receptacle, the same type used for RVs and many electric vehicle chargers.
- Breaker: Install a dedicated 50A double-pole breaker in your panel.
- Location: The receptacle should be installed within 25–30 feet of where the tiny home will sit, to avoid excessive extension cord use.
- Installer: A licensed electrician can set this up quickly if your property doesn’t already have it.
Plumbing
Our tiny homes come with standard residential sewer hookups (no tanks). You can connect to an existing municipal sewer system or a properly installed septic system.
Technical Details
- Connection type: 3″ ABS/PVC sewer line.
- Options:
- City sewer: Tie directly into your property’s cleanout connection.
- Septic system: Requires a permitted and installed septic tank/drain field.
- Ventilation: Homes are plumbed with vent stacks to meet code, so contractors should treat connections like any residential tie-in.
- Installer: A plumber or site contractor can extend sewer lines to the home’s parking pad.
Water
Water supply is as simple as connecting a hose. Our homes are built with RV-style inlets that accept standard garden hose hardware.
Technical Details
- Inlet type: ¾” garden hose thread (GHT) fitting with backflow prevention.
- Source: Standard outdoor spigot/frost-free hydrant.
- Pressure: Municipal water pressure (40–60 PSI) is typically fine, but a pressure regulator can be added if needed.
- Winterization: In colder climates, bury water lines below frost depth or use insulated/heated hose connections.
Propane
Propane powers the on-demand water heater and the kitchen cooktop. Each home comes pre-fitted with safe, easy-access propane hookups and tanks, installed on the trailer’s tongue.
Technical Details
Appliances:
- On-demand water heater: ~120,000 BTU/hr.
- Two-burner cooktop: ~15,000 BTU/hr (combined).
- Hookup: Dual 5-gallon propane tanks are included in the front utility hutch.
- Options:
- Exchange/refill tanks: Convenient but higher cost.
- Larger stationary tank: Work with a local propane supplier to install a 100–250 gallon tank. They typically lease the tank and provide delivery once or twice a year. This option is significantly more economical in the long run.
- Installer: Propane suppliers can connect the larger tank to the tiny home’s existing regulator.
Site Prep
Before delivery, make sure the spot for your tiny home is level, stable, and accessible. A solid base prevents shifting, ensures smooth setup, and protects your investment over time.
Technical Details
- Level surface:
- Use a laser level or transit to confirm the site is flat.
- Note that your tiny home comes with leveling feet on each corner. These are not designed to take the weight of major leveling adjustments, so don’t depend on them too much. Their main purposes is to stabilize the floor.
- Surface material:
- Gravel pad: Most common option. A 4–6″ compacted layer of ¾” minus crushed gravel provides drainage and stability.
- Concrete pad: Best for permanent placement. A poured slab ensures stability but is higher cost.
- Paved asphalt: Acceptable, though less common. Needs to be thick enough to bear the load of the trailer (approx. 14,000–18,000 lbs depending on model and options).
- Size: Pad should be at least 2 feet longer and wider than the home’s footprint (for a 24’x8.5’ model, prepare about 28’x12’).
- Access: Ensure clearances for delivery — typically 14’ vertical and 12’ horizontal clearance for transport vehicles.
- Drainage: Site should slope gently away from the pad to prevent water pooling under the home.
With these systems in place, your property will be move-in ready the day your Mount Baker Tiny Homes RV type tiny home arrives. Most of the work is standard electrical and plumbing that any licensed contractor can handle, with no unusual or proprietary connections required. We are happy to serve as a resource and coordinate with your contractors, but we don’t typically do this part of the project.
